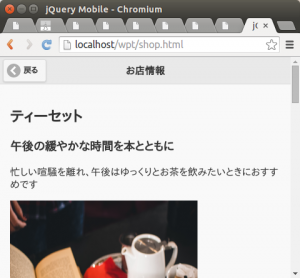
wordpress のテンプレに分割

wordpress のテンプレに分割

index.php のままでは wordpress にした意味がないので
これを分割し。
header.php
index.php
footer.php
に分割します

まず、最初にバックアップをとります

cp index.php index.html
vim header.php


内容を

<!DOCTYPE html>
<html>
<head>
<meta charset="UTF-8" />
<meta name="viewport" content="width=device-width, initial-scale=1" />
<title>jQuery Mobile</title>
<link rel="stylesheet"
href="http://code.jquery.com/mobile/1.4.3/jquery.mobile-1.4.3.min.css" />
<script src="http://code.jquery.com/jquery-1.11.1.min.js"></script>

<script src="http://code.jquery.com/mobile/1.4.3/jquery.mobile-1.4.3.min.js">
</script>
</head>
<body>
<div data-role="page" data-title="jQuery Mobile">
<div data-role="header">
 <h1>jQuery Mobile</h1>
</div>
<div role="main" class="ui-content">

とします

次に footer.php を作成します

vim footer.php

として内容を

</div>
<div data-role="footer">
 Copyright 1998-2015
</div>
</div>
</body>
</html>

とします

そして index.php は
shell[
vim index.php
[/shell]
で内容は

<?get_header(); ?>
本文だよ
<?php get_footer(); ?>

とします

これで
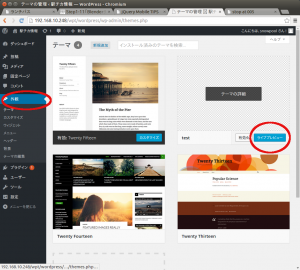
ダッシュボードの外観 で
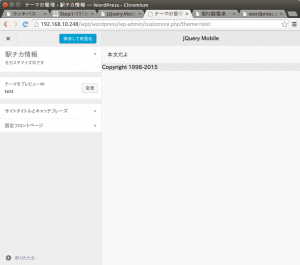
作成したテーマのライブプレビューで
ページを表示してみると
分割したときと変わらない状態で表示されます

wpt0

wpt

本体そのものは index.php ですが
テンプレートファイルとして
header.php
footer.php
と分割することで
他のページでも使いまわすことができるようになります
wordpress で jquery mobile

wordpress で jquery mobile

wordpress テーマにの作成には
index.php
style.css
functions.php
が最低限必須

あとは部品として
header.php
footer.php
用途によっては
sidebar.php
も必要

そして、今回はjquery mobile を
wordpress に入れるということで
最低限の部品だけで作成実験

前回、wordpress を新たにインストールしたので
そのディレクトリに移動

cd /var/www/html/wpt/wordpress/wp-content/themes/

この wp-content/themes/
がテーマをいれるところ

ここへテーマ用ディレクトリをつくって
作成していく

そのままだと書き込みできないので

 sudo chmod 777 ../themes/

で権限変更

mkdir test

でディレクトリ作成

ここへ必要なファイルを作成していきます

まず、style.css を作成

vim style.css

内容は

/*
Theme Name: test
Theme URI: http://example.com/
Description: jquey theme test
Author: Gen snowpool 
Author URI: http://example.com/
Version: 1.0
 
*/

で保存

次に index.php ですが
今回は jquery mobile が使えるか調べるだけなので

vim index.php

で内容を

<!DOCTYPE html>
<html>
<head>
<meta charset="UTF-8" />
<meta name="viewport" content="width=device-width, initial-scale=1" />
<title>jQuery Mobile</title>
<link rel="stylesheet"
href="http://code.jquery.com/mobile/1.4.3/jquery.mobile-1.4.3.min.css" />
<script src="http://code.jquery.com/jquery-1.11.1.min.js"></script>

<script src="http://code.jquery.com/mobile/1.4.3/jquery.mobile-1.4.3.min.js">
</script>
</head>
<body>
<div data-role="page" data-title="jQuery Mobile">
<div data-role="header">
 <h1>jQuery Mobile</h1>
</div>
<div role="main" class="ui-content">
  本文だよ
</div>
<div data-role="footer">
 Copyright 1998-2015
</div>
</div>
</body>
</html>

として保存します

これで
wordpress にログインし
ダッシュボードで
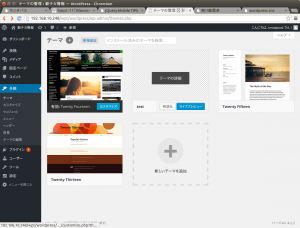
外観 > テーマで
今回作成した test を選び
ライブプレビュー

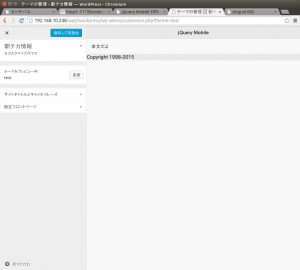
みると、
jquery mobile が反映されているのが確認できます

wpj

wpj2

ubuntu 15.04 へ gitweb インストール

ubuntu 15.04 へ gitweb インストール

sudo apt-get update 

でパッケージリストを更新

sudo apt-get update 

で gitweb をインストール

sudo a2enmod cgi


CGIを使えるように設定

設定を反映するために apache2 を再起動

 sudo systemctl restart apache2

gitweb を使うには
グループの作成と
所属するユーザが必要

sudo addgroup gitweb

でグループ追加

sudo gpasswd -a snowpool gitweb 

gpasswd コマンドは
グループを管理するコマンドで
-a を使ってグループに追加できる

詳しくは
【gpasswd】グループを管理する

を参考に

次に、作成した gitweb グループが
gitweb のディレクトリにアクセスできるように
権限を変更

sudo chown snowpool:gitweb /var/lib/git/
sudo chmod 775 /var/lib/git/

次にプロジェクト格納用ディレクトリを作成

mkdir /var/lib/git/project.git

所有者を変更

 sudo chown snowpool:gitweb /var/lib/git/project.git/

次に初期化

 cd /var/lib/git/project.git/
git init --bare --shared=true

次に

vim description 


リポジトリの名前を設定する

最初の中身は

Unnamed repository; edit this file 'description' to name the repository.

となっているので

gitweb のテスト

として保存

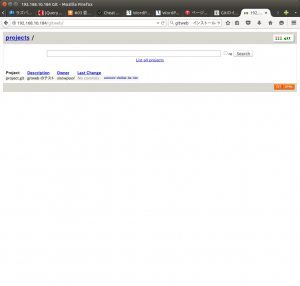
これで
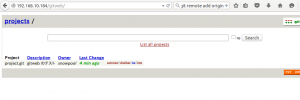
http://192.168.10.184/gitweb/
というように
サーバーのIP/gitweb
でアクセスすると画面が表示される

gitweb

これでサーバー側の設定ができたので
クライアントのほうを設定

クライアントには ubuntu 14.04 を使用

まず git をインストールする

sudo apt-get install git

次にユーザの登録

git config --global user.name "ユーザ名"

次にメールアドレスの登録

git config --global user.email "メールアドレス"

次に、gitサーバーで管理したいディレクトリに移り
初期化

mkdir Document
cd Document/
git init 

次にリポジトリの追加

git remote add origin snowpool@192.168.10.184:/var/lib/git/project.git/

そして実験のためのテキストファイル作成

echo test >text.txt

このファイルを git add で追加する

git add text.txt 

次にローカルgit リポジトリへファイルを登録

git commit -m "test.txt 作成" text.txt 

構文は
git commit -m “変更履歴の説明” 対象のファイル
となる

これで登録できたので
Git サーバーにファイルをアップロード

git push origin master 

これでブラウザで
http://192.168.10.184/gitweb/
へアクセスすると変更が反映されている

gitweb3

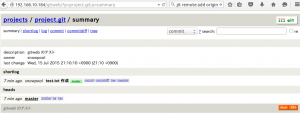
summary
をクリックすると詳細画面になる

gitweb4

shortlog は変更履歴

gitweb5

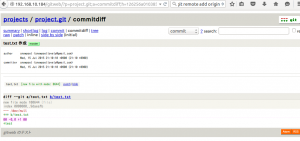
commitdiff は差分

gitweb6

snapshot をクリックすると
その時点でのファイルをダウンロードできる

これで git が使えるようになったので
あとは
ファイルを更新したら
git commit で登録
git push で送信
を行うことで変更履歴の管理をすることができる

wordpress のインストール

wordpress のインストール

wordpress テンプレファイルをつくるため
新しく wordpress のインストールします

すでにインストール済みであっても
別のディレクトリをつくれば問題なくインストールできます

このときに、新しくデータベースをつくれば
内容も新規につくっていけます

レンタルサーバーを借りなくても
VirtualBox などで仮想環境をつくれば実験できます

vagrant での構築ということもできますので
試したい場合
ドットインストールの動画をみると理解しやすいです
ローカル開発環境の構築

wget http://ja.wordpress.org/latest-ja.zip

でファイル取得

unzip latest-ja.zip 

で解凍

あとはこれを

mv wordpress /var/www/html/wpt/

で移動

データベース関連は毎回つくるときに
手打ちでやるのは面倒なので
sql ファイルを作成して、これを読み込ませることに

vim wordpress.sql

で sql ファイルを作成

内容は

 create database wddb; 
grant all privileges on wddb.* to hoge@'localhost' identified by 'hogehoge'; 
flush privileges; 

とします

ファイル内容については
CentOS 7 でLAMP(Apache+MariaDB(MySQL)+PHP)インストールからWordPressを動かすまで(Apache編)

を参考にさせていただきました

私の環境は ubuntu であること
そしてすでに wordpress が別の目的で
すでにインストール済み
mysql も root ユーザのパスワード設定ずみ
という状態です

これを実行するのですが
さすがにパスワードをみれる状態にするのは抵抗あるので

 mysql -uroot -p < wordpress.sql 

で実行

mysql root パスワードがあっていれば
データベースが作成されます

あとは所有者を変更します

sudo chown -R www-data:www-data /var/www/html/wpt/wordpress/

これをやらないと権限の関係で
ブラウザからのインストールでつまづきます

ホーム画面のボタンをリンクに変更

ホーム画面のボタンをリンクに変更

アイコンをクリックしたら
一覧を開くようにしたいので
button 要素を a要素に変えることにしました

なお、今回はテストなので、すべて
一覧の sweet.html にリンクするようにしています

すべて書き換えるのは面倒なので

cp home.html home2.html

でバックアップしておき
もし前のほうがよかったということのないようにしておきます

次に vim の置き換えを使って一気に変換します
sed コマンドでもいいのですが
失敗したときに
vim なら :u で戻せるので
vim による編集を行います

:%s/button/a/g

を実行し
button を a にすべて変えます

次に、リンク先を追加したいので

:%s/class="ui-btn ui-corner-all" /class="ui-btn ui-corner-all" href="sweet.html"/g

を実行

これで全て置き換えできました

:w
で保存して一度 chrome で動作確認します

見た目は変化ありませんが、和食などの
アイコンをクリックすれば、一覧にリンクし
そこからクリックすれば
お店の詳細が開きます

home

home2

home3

これでテンプレの元になるファイルができたので
wordpress テンプレファイルに変えていきます

グリッドレイアウトにアイコン設置

グリッドレイアウトにアイコン設置

次に、アイコンをつけるようにします
このため

mkdir icon

でアイコンフォルダを作成

ここへアイコン画像をいれます

必要になるアイコンをダウンロード

今回は
http://icooon-mono.com/

フリーでダウンロードできるようなので
ここから何種類をダウンロード

和食には
ご飯の無料アイコン

洋食には
フォークとナイフのお食事アイコン素材2

もしくは
ナイフ、お皿、フォークのお食事アイコン2

カフェには
休憩、カフェのマークのアイコン

スイーツには
ケーキのアイコン4

中華には
肉まん、あんマンのアイコン

ラーメンには
Ramen iconラーメンなどの麺類のアイコン素材

食べ物のロゴ以外にほしいものは
カメラ
地図
twitter
なので

カメラは
jQuery Mobileのアイコン
もしくは
カメラのアイコン素材

を使えばOK

地図は
目的地アイコン1

twitter で書き込むのには
インクボトルと羽根のペンのアイコン素材2

というようにします

ボタンにアイコンをつけたいので
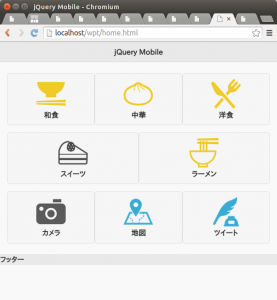
img 要素でアイコンを設置
br要素で改行すれば
画像の下へ文字がでるようになります

<button class="ui-btn ui-corner-all"><img src="icon/wa.png" alt="" class="ic"><br>和食</button>

iPod touch で確かめてみたのですが
アイコンサイズは
64×64 あたりがちょうど良いと思います

このため

<style>
  img.ic{
    width: 64px;
    height: 64px;
  }
</style>

</head>

の上に追記して幅と高さを調整しています

grid2

これで、他のボタンもアイコンを設置していきます

画像に関してはダウンロードしてから名前を変えてあります

和食には wa.png
中華には chu.png
洋食は yo.png
スイーツには cake.png
ラーメンには ramen.png
カメラは camera.png
地図は map.png
ツイートは tweet.png
としました

<div class="ui-grid-b">
  <div class="ui-block-a">

    <button class="ui-btn ui-corner-all"><img src="icon/wa.png" alt="" class="ic"><br>和食</button>
  </div>
  <div class="ui-block-b">
    <button class="ui-btn ui-corner-all"><img src="icon/chu.png" alt="" class="ic"><br>中華</button>
  </div>
  <div class="ui-block-c">
    <button class="ui-btn ui-corner-all"><img src="icon/yo.png" alt="" class="ic"><br>洋食</button>
  </div>
</div>

<!-- 2行目 -->
<div class="ui-grid-a">
  <div class="ui-block-a">
    <button class="ui-btn ui-corner-all"><img src="icon/cake.png" alt="" class="ic"><br>スイーツ</button>
  </div>

  <div class="ui-block-b">
    <button class="ui-btn ui-corner-all"><img src="icon/ramen.png" alt="" class="ic"><br>ラーメン</button>
  </div>
</div>

<!-- 3行目 -->
<div class="ui-grid-b">
  <div class="ui-block-a">
    <button class="ui-btn ui-corner-all"><img src="icon/camera.png" alt="" class="ic"><br>カメラ</button>
  </div>
  <div class="ui-block-b">
    <button class="ui-btn ui-corner-all"><img src="icon/map.png" alt="" class="ic"><br>地図</button>
  </div>
  <div class="ui-block-c">
    <button class="ui-btn ui-corner-all"><img src="icon/tweet.png" alt="" class="ic"><br>ツイート</button>
  </div>
</div>

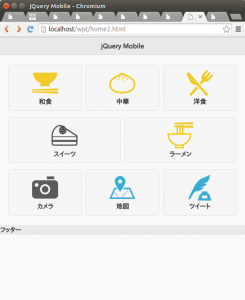
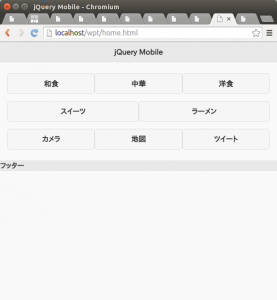
これで画像付きボタンのできあがりです

grid3

今回のソースは以下のようになります

<!DOCTYPE html>
<html>
<head>
<meta charset="UTF-8" />
<meta name="viewport" content="width=device-width, initial-scale=1" />
<title>jQuery Mobile</title>
<link rel="stylesheet"
href="http://code.jquery.com/mobile/1.4.3/jquery.mobile-1.4.3.min.css" />
<script src="http://code.jquery.com/jquery-1.11.1.min.js"></script>

<script src="http://code.jquery.com/mobile/1.4.3/jquery.mobile-1.4.3.min.js">
</script>
<style>
  img.ic{
    width: 64px;
    height: 64px;
  }
</style>
</head>
<body>
<div data-role="page" data-title="jQuery Mobile">
<div data-role="header">
 <h1>jQuery Mobile</h1>
</div>
<div role="main" class="ui-content">

<!-- 1行目 -->
<div class="ui-grid-b">
  <div class="ui-block-a">

    <button class="ui-btn ui-corner-all"><img src="icon/wa.png" alt="" class="ic"><br>和食</button>
  </div>
  <div class="ui-block-b">
    <button class="ui-btn ui-corner-all"><img src="icon/chu.png" alt="" class="ic"><br>中華</button>
  </div>
  <div class="ui-block-c">
    <button class="ui-btn ui-corner-all"><img src="icon/yo.png" alt="" class="ic"><br>洋食</button>
  </div>
</div>

<!-- 2行目 -->
<div class="ui-grid-a">
  <div class="ui-block-a">
    <button class="ui-btn ui-corner-all"><img src="icon/cake.png" alt="" class="ic"><br>スイーツ</button>
  </div>

  <div class="ui-block-b">
    <button class="ui-btn ui-corner-all"><img src="icon/ramen.png" alt="" class="ic"><br>ラーメン</button>
  </div>
</div>

<!-- 3行目 -->
<div class="ui-grid-b">
  <div class="ui-block-a">
    <button class="ui-btn ui-corner-all"><img src="icon/camera.png" alt="" class="ic"><br>カメラ</button>
  </div>
  <div class="ui-block-b">
    <button class="ui-btn ui-corner-all"><img src="icon/map.png" alt="" class="ic"><br>地図</button>
  </div>
  <div class="ui-block-c">
    <button class="ui-btn ui-corner-all"><img src="icon/tweet.png" alt="" class="ic"><br>ツイート</button>
  </div>
</div>

</div>
<div data-role="footer">
 フッター
</div>
</div>
</body>
</html>

グリッドレイアウトでホーム画面作成

グリッドレイアウトでホーム画面作成

お店紹介ページ
一覧ページができたので

次に、グリッドレイアウトでホーム画面をつくります

グリッドレイアウトにするには
jQuery Mobile もしくは
Bootstrap を使うことになりますが
まずは jQuery Mobile で行っていきます

今回、想定しているのは
3×3 のレイアウト

和食 中華 洋食
スイーツ ラーメン 
カメラ 地図 ツイート
というかんじ

なので3列のグリッドを最初につくります

<div class="ui-grid-b">

で領域指定します

その中に

  <div class="ui-block-a">
    <button class="ui-btn ui-corner-all">和食</button>
  </div>
  <div class="ui-block-b">
    <button class="ui-btn ui-corner-all">中華</button>
  </div>
  <div class="ui-block-c">
    <button class="ui-btn ui-corner-all">洋食</button>
  </div>

というようにコンテンツを追加します

全体としては

<!-- 1行目 -->
<div class="ui-grid-b">
  <div class="ui-block-a">
    <button class="ui-btn ui-corner-all">和食</button>
  </div>
  <div class="ui-block-b">
    <button class="ui-btn ui-corner-all">中華</button>
  </div>
  <div class="ui-block-c">
    <button class="ui-btn ui-corner-all">洋食</button>
  </div>
</div>

<!-- 2行目 -->
<div class="ui-grid-a">
  <div class="ui-block-a">
    <button class="ui-btn ui-corner-all">スイーツ</button>
  </div>

  <div class="ui-block-b">
    <button class="ui-btn ui-corner-all">ラーメン</button>
  </div>
</div>

<!-- 3行目 -->
<div class="ui-grid-b">
  <div class="ui-block-a">
    <button class="ui-btn ui-corner-all">カメラ</button>
  </div>
  <div class="ui-block-b">
    <button class="ui-btn ui-corner-all">地図</button>
  </div>
  <div class="ui-block-c">
    <button class="ui-btn ui-corner-all">ツイート</button>
  </div>
</div>

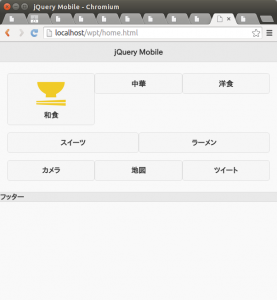
というようになります

grid

今回のソースは、以下のようになります

<!DOCTYPE html>
<html>
<head>
<meta charset="UTF-8" />
<meta name="viewport" content="width=device-width, initial-scale=1" />
<title>jQuery Mobile</title>
<link rel="stylesheet"
href="http://code.jquery.com/mobile/1.4.3/jquery.mobile-1.4.3.min.css" />
<script src="http://code.jquery.com/jquery-1.11.1.min.js"></script>

<script src="http://code.jquery.com/mobile/1.4.3/jquery.mobile-1.4.3.min.js">
</script>
</head>
<body>
<div data-role="page" data-title="jQuery Mobile">
<div data-role="header">
 <h1>jQuery Mobile</h1>
</div>
<div role="main" class="ui-content">

<!-- 1行目 -->
<div class="ui-grid-b">
  <div class="ui-block-a">

    <button class="ui-btn ui-corner-all">和食</button>
  </div>
  <div class="ui-block-b">
    <button class="ui-btn ui-corner-all">中華</button>
  </div>
  <div class="ui-block-c">
    <button class="ui-btn ui-corner-all">洋食</button>
  </div>
</div>

<!-- 2行目 -->
<div class="ui-grid-a">
  <div class="ui-block-a">
    <button class="ui-btn ui-corner-all">スイーツ</button>
  </div>

  <div class="ui-block-b">
    <button class="ui-btn ui-corner-all">ラーメン</button>
  </div>
</div>

<!-- 3行目 -->
<div class="ui-grid-b">
  <div class="ui-block-a">
    <button class="ui-btn ui-corner-all">カメラ</button>
  </div>
  <div class="ui-block-b">
    <button class="ui-btn ui-corner-all">地図</button>
  </div>
  <div class="ui-block-c">
    <button class="ui-btn ui-corner-all">ツイート</button>
  </div>
</div>

</div>
<div data-role="footer">
 フッター
</div>
</div>
</body>
</html>

aspellでスペルチェック

aspellでスペルチェック

aspell は英文のスペルチェック機能をもつ

ただし言語環境が日本語だと動作しない

今回の実験環境は
ドットインストールで構築した
vagrant の centos

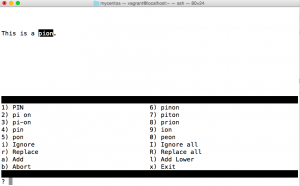
This is a pion.

という内容で

vim hoge
でつくる

aspell に -c オプションをつければ
ファイルのスペルチェックができる

しかし

LANG=C aspell -c hoge

を実行すると

 No word lists can be found for the language "en_US".

となってしまう

このため
CentOS 6.4 に aspell-en をインストール

を参考に

sudo yum install aspell-en

でインストール

これで再度

LANG=C aspell -c hoge

を実行すれば、校正する候補がでてくる

もし候補がなければ x で抜ける

スクリーンショット 2015-07-14 7.25.27

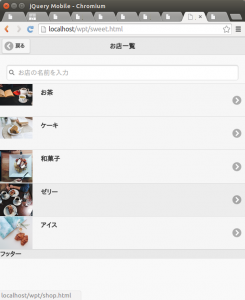
リストにサムネイル画像を表示

リストにサムネイル画像を表示

検索機能つきのリストを作成したので
今回はモバイルサイトによくあるように
左側に画像をつけてみます

画像をゼロから用意するのは大変なので

http://foodiesfeed.com/
からいくつか適当にダウンロードします

なお、テストなので文章と画像は一致してません

ダウンロードしたファイル名は長いので

blead.jpg
cake.jpg
cofee.jpg
food.jpg
tee.jpg
に名前を変えておきます

そして、これを imageフォルダにいれておきます

リスト項目の先頭にサムネイル画像をおくのなら
li 要素に
class=”ui-li-has-thumb”
を追加します

そして、img 要素を設置します

<li><a href="shop.html">お茶</a></li>

となっている部分を

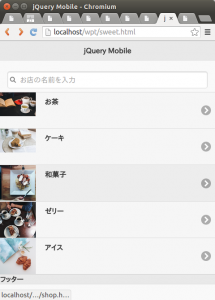
<li class="ui-li-has-thumbnail"><a href="shop.html"><img src="image/tee.jpg"  />お茶</a></li>

とすると画像が表示されます

swl

今回のソースは以下のようになります

<!DOCTYPE html>
<html>
<head>
<meta charset="UTF-8" />
<meta name="viewport" content="width=device-width, initial-scale=1" />
<title>jQuery Mobile</title>
<link rel="stylesheet"
href="http://code.jquery.com/mobile/1.4.3/jquery.mobile-1.4.3.min.css" />
<script src="http://code.jquery.com/jquery-1.11.1.min.js"></script>

<script src="http://code.jquery.com/mobile/1.4.3/jquery.mobile-1.4.3.min.js">
</script>
</head>
<body>
<div data-role="page" data-title="jQuery Mobile">
<div data-role="header" data-add-back-btn="thue" data-back-btn-text="戻る">
 <h1>お店一覧</h1>
</div>
<div role="main" class="ui-content">

<form action="" class="ui-filterable">
  <input type="text" id="keywd" data-type="search" placeholder="お店の名前を入力">
</form>

  <ul data-role="listview" data-filter="true" data-input="#keywd">
    <li class="ui-li-has-thumbnail"><a href="shop.html"><img src="image/tee.jpg"  />お茶</a></li>
    <li class="ui-li-has-thumbnail"><a href="shop.html"><img src="image/cake.jpg"  />ケーキ</a></li>
    <li class="ui-li-has-thumbnail"><a href="shop.html"><img src="image/food.jpg"  />和菓子</a></li>
    <li class="ui-li-has-thumbnail"><a href="shop.html"><img src="image/cofee.jpg"  />ゼリー</a></li>
    <li class="ui-li-has-thumbnail"><a href="shop.html"><img src="image/blead.jpg"  />アイス</a></li>
  </ul>

</div>
<div data-role="footer">
 フッター
</div>
</div>
</body>
</html>

お店一覧リスト作成

お店一覧リスト作成

jqeury mobile では
リストをつくるときに
ul要素に
data-role=”listview”
をつけます

リストそのものは li で作成します
今回はクリックしたらお店情報ページにリンクしたいので
a 要素でクリックしたときにリンクするようにします

まずはリストを作成します

ちなみに Atom エディタで emmet パッケージをいれたり
vim で emmet を入れている場合

  ul[data-role=listview]>(li>a[href=shop.html]{お店情報})*5

で簡単にソースを書けます

Atom なら tab キーを押すとソースが作成されます

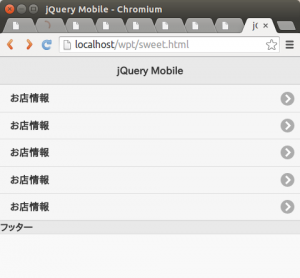
これで

  <ul data-role="listview">
    <li><a href="shop.html">お店情報</a></li>
    <li><a href="shop.html">お店情報</a></li>
    <li><a href="shop.html">お店情報</a></li>
    <li><a href="shop.html">お店情報</a></li>
    <li><a href="shop.html">お店情報</a></li>
  </ul>

ができます

前回、すでに戻るボタンが作成してあるので
クリックすると戻るボタンがでているのがわかります

sw

sw2

次に、検索ボックスを配置します
このときに listview と組み合わせるために
idを検索ボックスにつけます
また、form には
class=”ui-filterable”
をつけます

ソースにすると

<form action="" class="ui-filterable">
  <input type="text" id="keywd" data-type="search">
</form>

というようになります

emmet で書くと、以下のコードを書いて tabで展開します

form.ui-filterable>input#keywd[data-type=search]

なお、リストを検索可能にするには

  <ul data-role="listview">

の部分にソースを加えます

data-fileter=”true”で検索機能を有効化

data-input=”#keywd”
というように、
input で id=”” で指定した id を#をつけて書きます

ちなみに、よく見かける薄い文章は
placeholder=””
で設定することでできます

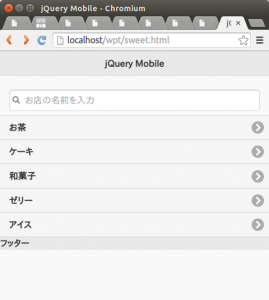
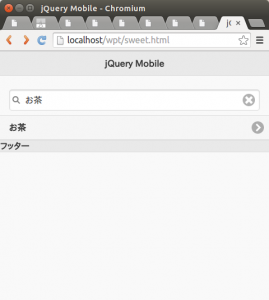
また、そのままだと実験できないので、リストの中身も変えてみます

<form action="" class="ui-filterable">
  <input type="text" id="keywd" data-type="search" placeholder="お店の名前を入力">
</form>

  <ul data-role="listview" data-filter="true" data-input="#keywd">
    <li><a href="shop.html">お茶</a></li>
    <li><a href="shop.html">ケーキ</a></li>
    <li><a href="shop.html">和菓子</a></li>
    <li><a href="shop.html">ゼリー</a></li>
    <li><a href="shop.html">アイス</a></li>
  </ul>

これでリストと検索機能ができました

sw3

sw4

今回のソースは

<!DOCTYPE html>
<html>
<head>
<meta charset="UTF-8" />
<meta name="viewport" content="width=device-width, initial-scale=1" />
<title>jQuery Mobile</title>
<link rel="stylesheet"
href="http://code.jquery.com/mobile/1.4.3/jquery.mobile-1.4.3.min.css" />
<script src="http://code.jquery.com/jquery-1.11.1.min.js"></script>

<script src="http://code.jquery.com/mobile/1.4.3/jquery.mobile-1.4.3.min.js">
</script>
</head>
<body>
<div data-role="page" data-title="jQuery Mobile">
<div data-role="header" data-add-back-btn="thue" data-back-btn-text="戻る">
 <h1>jQuery Mobile</h1>
</div>
<div role="main" class="ui-content">

<form action="" class="ui-filterable">
  <input type="text" id="keywd" data-type="search" placeholder="お店の名前を入力">
</form>

  <ul data-role="listview" data-filter="true" data-input="#keywd">
    <li><a href="shop.html">お茶</a></li>
    <li><a href="shop.html">ケーキ</a></li>
    <li><a href="shop.html">和菓子</a></li>
    <li><a href="shop.html">ゼリー</a></li>
    <li><a href="shop.html">アイス</a></li>
  </ul>

</div>
<div data-role="footer">
 フッター
</div>
</div>
</body>
</html>

となります