ConoHa VPS 設定(Lets Encript の適用)
Apache のインストールまではできているので
設定を変更
を参考に設定
su -
で管理者権限になり
vim /etc/httpd/conf/httpd.conf
でファイルを開き
TraceEnable off
を最終行に追記
なお
shift +g で最終行に移動して
o を押して書き込みモードにして
ctrl + shift + v で貼り付けすると楽
この意味は
エラー画面にサーバー情報を表示しないようにする
というもの
これについては
apacheで攻撃者に有用な情報を与えない対策
を参考に
次に
144行目の
Options Indexes FollowSymLinks
を
Options Includes ExecCGI FollowSymLinks
へ変更し
CGI,SSIの許可
次に151行めの
AllowOverride None
を
AllowOverride All
と変更することで
.htaccess を許可
次にautoindex 設定ファイルを修正
vim /etc/httpd/conf.d/autoindex.conf
で設定ファイルを開き
24行目の
Options Indexes MultiViews FollowSymlinks
を
Options MultiViews
とすることで
icons ディレクトリのファイル一覧を表示しないように設定
次に
SSLデフォルト設定ファイルを編集
しかし、対象となるファイルが見当たらないため
Webサーバー間通信内容暗号化(Apache+mod_SSL+Certbot)
を参考に設定
まずは Certbot クライアントのインストール
yum -y install git
で git をインストール
次に
cd /usr/local/
git clone https://github.com/certbot/certbot
cd
/usr/local/certbot/certbot-auto -n
で
certbot クライアントをインストール
次にサーバ証明書の取得
構文は
/usr/local/certbot/certbot-auto certonly --webroot -w ドキュメントルート -m メールアドレス -d Webサーバー名 --agree-tos
今回は
ドキュメントルートは
/var/www/html/
webサーバ名はドメインの
www.snowpool.info
メルアドは私の gmail アドレスで行いました
実行すると
Would you be willing to share your email address with the Electronic Frontier
Foundation, a founding partner of the Let's Encrypt project and the non-profit
organization that develops Certbot? We'd like to send you email about our work
encrypting the web, EFF news, campaigns, and ways to support digital freedom.
- - - - - - - - - - - - - - - - - - - - - - - - - - - - - - - - - - - - - - - -
(Y)es/(N)o:
というように
Lets Encript パートナーにメルアドを公開していいか聞かれるので
さすがに公開は嫌なので
N
としました
次に mod_ssl のインストール
yum -y install mod_ssl
次にSSL設定ファイルを編集
vim /etc/httpd/conf.d/ssl.conf
で設定ファイルを開き
100行目の
SSLCertificateFile /etc/pki/tls/certs/localhost.crt
を
SSLCertificateFile /etc/letsencrypt/live/www.snowpool.info/cert.pem
に変更
107行目の
SSLCertificateKeyFile /etc/pki/tls/private/localhost.key
を
SSLCertificateKeyFile /etc/letsencrypt/live/www.snowpool.info/privkey.pem
に変更
116行目の
#SSLCertificateChainFile /etc/pki/tls/certs/server-chain.crt
を
SSLCertificateChainFile /etc/letsencrypt/live/www.snowpool.info/chain.pem
に変更し保存
そして94行目に
SSLCipherSuite ECDH+AESGCM:DH+AESGCM:ECDH+AES256:DH+AES256:ECDH+AES128:DH+AE    S:RSA+AESGCM:RSA+AES:!aNULL:!MD5:!DSS

SSLHonorCipherOrder on
を追加することで
暗号化方法の追加と
暗号化方法をサーバ側で決定できるように設定
ここまでできたら保存して
systemctl reload httpd
で Apache を再起動
これで https://ドメイン名
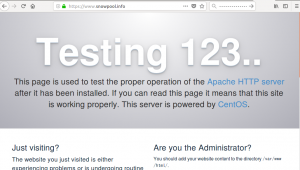
でアクセスして鍵マークが出ていれば成功
