ubuntu 18.04 日本語 Remix でGitLab
ubuntu 18.04 の GitLab 環境を
ローカルで使用したいので
virtualBox で構築
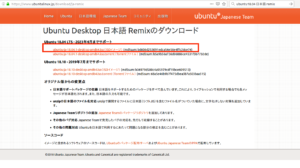
まずはISOファイルのダウンロード
Ubuntu Desktop 日本語 Remixのダウンロード
から
ubuntu-ja-18.04.1-desktop-amd64.iso(ISOイメージ)
をダウンロード
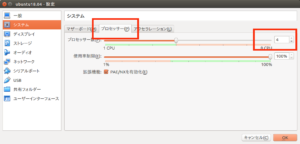
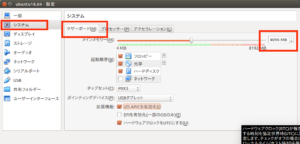
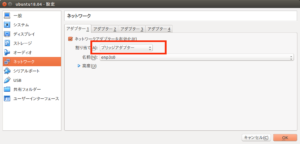
次に VirtualBoxで仮想マシン作成
今回はメモリ4GB
CPUを4つ割当し
ネットワークをブリッジアダプターにしておきます
ubuntu18.04 のダウンロードが完了したら
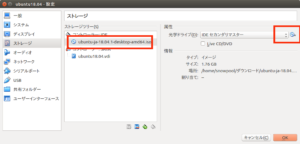
ストレージの
IDE の光学ドライブの設定を
ubuntu 18.04 のISOファイルを指定するようにします
あとは起動をクリックすれば
インストール画面になるのでそのまま続けていきます
インストール完了後
今回は
Ubuntu 18.04 LTSにDockerを使ってGitLabとMattermostを導入してみた
を参考に
Docker を使って GitLab を導入します
が、ここで問題発生
今後は ssh で接続して行おうと思って
ifconfig コマンドでIPアドレスを調べようとしたら
コマンドが存在しないとのこと
Ubuntu 17.04 その132 – ifconfigからipコマンドへ移行しよう・ipコマンドはifconfigを置き換える
によると
ip コマンドを代わりに使うようです
使い方に関しては
ipコマンド備忘録
などを参考に今後調べていく予定
ip addr
で現在のIPアドレスがわかるので
次に ssh 接続できるように
ubuntu18.04 側へ openssh-server をインストールし
.ssh ディレクトリにを作成
sudo apt-get -y install ssh
mkdir .ssh
chmod 700 .ssh/
次に
クライアントマシンとしての ubuntu16.04 から
ssh で接続して操作します
cd .ssh/
ssh-keygen -t rsa -f gitlab_snowpool
今回は gitlab_snowpool
というファイル名にしました
ファイル名は任意でOK
これで鍵ができたので
scp gitlab_snowpool.pub snowpool@192.168.1.139:/home/snowpool/.ssh/.
で鍵を scp でコピー
コピーできたら
再び ubuntu18.04 側で
cd .ssh/
cat gitlab_snowpool.pub >> authorized_keys
chmod 600 authorized_keys
として authorized_key を作成し
権限を変更
ubuntu 18.04 LTS のサーバーに公開鍵認証でssh接続
を参考にホスト名でアクセスできるように設定をします
接続元のubuntu16.04 で
vim .ssh/config
でファイルを作成し
Host gitlab
        HostName 192.168.1.139
        User snowpool
        Port 22
        IdentityFile /home/snowpool/.ssh/gitlab_snowpool
というように
Host には任意の名前のホスト名
HostName にはIPアドレス
User にはユーザ名
Port には接続ポート
IdentityFile には鍵ファイルのパスを指定
これで
ssh gitlab
とすればパスワードなしでログインできるようになります
次に
sudo apt-get install vim
 sudo vim /etc/ssh/sshd_config
で設定ファイルを開き
56行目の
#PasswordAuthentication yes
を
PasswordAuthentication no
とすることで
鍵認証のみログインできるようにして
パスワードでのログインを禁止します
あとは設定を反映するために
systemctl restart ssh
パスワードログインの禁止については
OpenSSH : SSH 鍵認証
を参考にしました
次に GitLab の導入
今回は
Ubuntu 18.04 LTSにDockerを使ってGitLabとMattermostを導入してみた
を参考に導入します
まずはリポジトリアップデート
sudo apt-get update
次にHTTPSでリポジトリを使うためのパッケージをインストール
sudo apt-get install apt-transport-https ca-certificates curl software-properties-common
しかし
E: dpkg は中断されました。問題を修正するには 'sudo dpkg --configure -a' を手動で実行する必要があります。
となってしまうため
sudo dpkg --configure -a
を実行
再度
sudo apt-get install apt-transport-https ca-certificates curl software-properties-common
を実行することでインストールは成功
次に Docker 公式GPGキーの追加
curl -fsSL https://download.docker.com/linux/ubuntu/gpg | sudo apt-key add -
GPGキーの取得確認は
sudo apt-key fingerprint 0EBFCD88
次に安定版の Docker リポジトリ設定
Stable 版が安定版
sudo add-apt-repository \
   "deb [arch=amd64] https://download.docker.com/linux/ubuntu \
   artful \
   stable"
リポジトリを変更したので、再度
sudo apt-get update
で更新
次にDocker のインストール
sudo apt-get install docker-ce
Docker のバージョンを調べるには
docker version
で調べることができます
次に GitLab の Docker イメージを pull
sudo docker pull gitlab/gitlab-ce
次に ifconfig を使うためツールをインストール
sudo apt install net-tools
これで IPアドレスを調べておく
次に gitlab 用ファイルを保存するディレクトリを作成
mkdir -p gitlab/config
mkdir -p gitlab/logs
mkdir -p gitlab/data
なお、一般ユーザで docker を使おうとすると
Got permission denied while trying to connect to the Docker daemon socket at unix:///var/run/docker.sock: Get http://%2Fvar%2Frun%2Fdocker.sock/v1.39/images/json: dial unix /var/run/docker.sock: connect: permission denied
というようなエラーメッセージがでる
対処としては
ユーザを docker グループへ所属させる
もしくは
sudo をつけて実行
次に
makefile を作成
sudo apt install make
で make をインストールし
vim makefile
でファイルを作成
中身は
start:
  sudo docker run --detach \
      --hostname 192.168.1.139 \
      --publish 443:443 --publish 80:80 --publish 2222:22 --publish 8001:8001  --publish 9090:9090 \
      --name gitlab \
      --restart always \
      --volume /home/snowpool/gitlab/config:/etc/gitlab \
      --volume /home/snowpool/gitlab/logs:/var/log/gitlab \
      --volume /home/snowpool/gitlab/data:/var/opt/gitlab \
      gitlab/gitlab-ce:latest

restart:
  sudo docker restart gitlab

stop:
  sudo docker stop gitlab

rm:
  sudo docker rm gitlab
として保存
ちなみに、コマンドの sudo の前は
スペースではなく tab
スペースで書いてしまうと
makefile:2: *** 複数のターゲットパターンです. 中止.
となってしまうので注意
makefile の書き方については
Makefileの書き方
を参考に
なお make についてわからなかったので
Makefileを使ってスマート?にDocker+Railsの開発をしようとした
を参考したところ
コマンドの省略に使えそうとのこと
また docker の起動や停止については
Dockerでコンテナ作成/起動/停止/自分用Image作成
を参考に
もしコンテナ起動時に
docker: Error response from daemon: Conflict. The container name "/gitlab" is already in use by container "cf98f43e7b160c26b663f65e4a5487e48d3a0ca27fd6ef29504736a59c93560e". You have to remove (or rename) that container to be able to reuse that name.
となる場合
にあるように一度コンテナを削除
今回なら
sudo docker rm gitlab
また、今回の場合
ホストマシンで 22 番ポートを使っているので
ssh で使用するポートを22にすると
docker: Error response from daemon: driver failed programming external connectivity on endpoint gitlab (45d121856a9d4eb420973d76ac265049026800565d1395fac7879656ed936f25): Error starting userland proxy: listen tcp 0.0.0.0:22: bind: address already in use.
となってしまう
現在使用しているポートは
sudo lsof -i -P | grep "LISTEN"
で調べることができる
次に
クライアントマシンの ubuntu 16 に
クリっプボードにコピーを簡単にするコマンド xsel をインストール
sudo apt install xsel
コマンドの引数が面倒なので
echo "alias pbcopy='xsel --clipboard --input'" >> ~/.bashrc
source ~/.bashrc
で反映
これでできると思ったけど
最後に git push するときに エラーになるため
docker での Gitlab を断念し
通常のインストールで運用することに
【Ubuntu 18.04 LTS Server】GitLabでGitサーバを構築する
を参考に実践
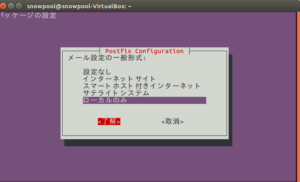
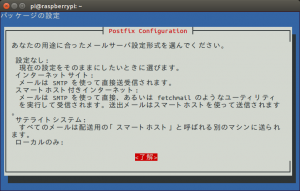
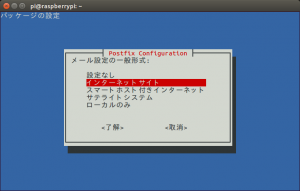
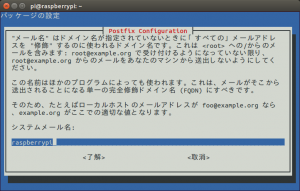
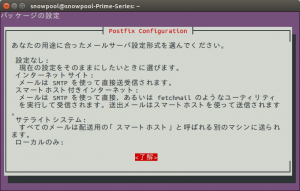
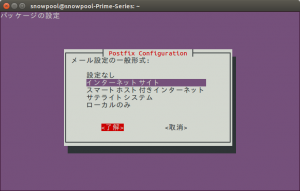
sudo apt install postfix
でメールサーバーをインストール
形式は
ローカルのみ
を選択
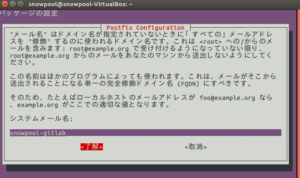
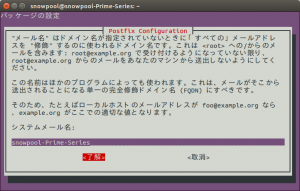
なお、システムメール名は任意のものを入力
次に Gitlab リポジトリ登録
curl -sS https://packages.gitlab.com/install/repositories/gitlab/gitlab-ce/script.deb.sh | sudo bash
そして Gitlab インストール
sudo apt install gitlab-ce
次に設定ファイルの編集
sudo vim /etc/gitlab/gitlab.rb
で13行目を
external_url 'http://192.168.1.139'
というようにIPを指定
49行目の
# gitlab_rails['time_zone'] = 'UTC'
を
[she]
gitlab_rails[‘time_zone’] = ‘Asia/Tokyo’
[/shell]
として保存
sudo gitlab-ctl reconfigure
で設定を反映
sudo gitlab-ctl status
でGitlab の状態を確認できる
なお、再起動をしたいときには
sudo gitlab-ctl restart
で Gitlab の再起動ができる
なお、この状態で仮想マシンを再起動すると Docker が起動してしまうため
make stop
sudo gitlab-ctl restart
として一度 Dockerコンテナを停止してから
Gitlab を再起動する必要あり
これで Gitlab が使えるようになったので
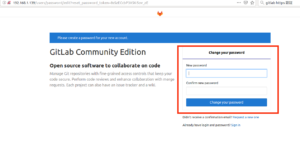
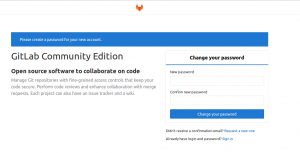
ブラウザで Gitlab サーバーのIPへアクセスすると
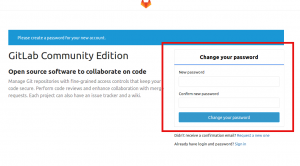
管理者ユーザの
新しいパスワードの設定になるので
パスワードを入力し
Change your Password をクリック
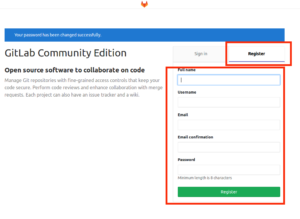
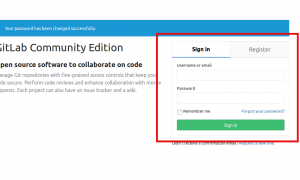
Register で登録ができるので
Full name
username
にはユーザ名
Email と Email Confirmation にはメルアド
Password にはパスワードを入力し
Register で登録
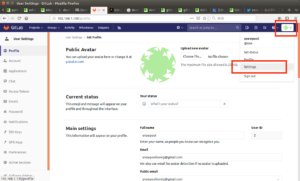
次に、SSHキーの設定をするので
Settings をクリック
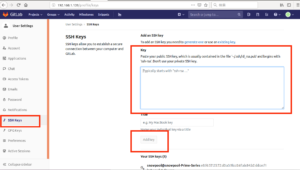
SSH Keys をクリックし
鍵をコピペする
鍵のコピーには
xsel を使うと便利なので
sudo apt install xsel
でインストールし
xsel のオプション設定の面倒を省くためエイリアスを設定
echo "alias pbcopy='xsel --clipboard --input'" >> ~/.bashrc
source ~/.bashrc
これで
cat ~/.ssh/gitlab_snowpool.pub | pbcopy
でSSH key をコピーできるので
これを貼り付けて
Add key をクリックすれば登録完了
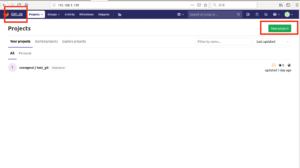
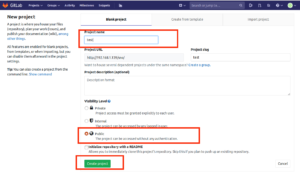
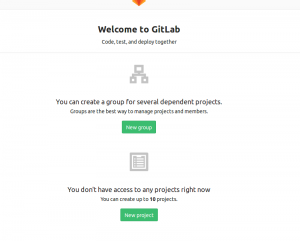
あとは新規リポジトリを作成してテストしたいので
Gitlabアイコンをクリックし
New Project をクリック
Project Name にリポジトリ名を入れ
Public にして
Crate project をクリック
ここまでできたら
あとはクライアントマシンで git を使えばいい
なお、リポジトリについては
SSH をクリックし、コピーアイコンをクリックすれば
リポジトリのコピーができるので
あとは
git clone git@192.168.1.139:sno/test.git
cd test
touch README.md
git add README.md
git commit -m "add README"
git push -u origin master
とすればgitlab でのリポジトリ管理ができるようになる
git push するときに
Git global setup をしていないと
to set your account's default identity. Omit --global to set the identity only in this repository.
というようにエラーになるので
git config --global user.name "First-name Family-name"
First-name Family-nameの部分は自分の名前
git config --global user.email "username@example.com"
username@example.com の部分は自分のメルアド
というように設定をすればOK
なお、git commit での nano ではなく vim にしたいのなら
Gitをインストールしたら真っ先にやっておくべき初期設定
を参考に
