
Custom Field Template でテーブル作成
WordPressとプラグインを使ってお店紹介サイトを作る方法
を参考に
Custom Field Templateプラグインを使い
テーブルを作成します
    <thead>
      <tr>
        <th>店名</th>
        <th>定休日</th>
        <th>価格</th>
        <th>住所</th>
        <th>電話番号</th>
        <th>HP</th>
        <th>アクセス</th>
      </tr>
    </thead>
    <tbody>
      <tr>
        <td>○○のお店</td>
        <td>日曜日</td>
        <td>ランチ1000円</td>
        <td>東京都</td>
        <td>000-000-0000</td>
        <td>http://example.co.jp</td>
        <td>○○駅○版口から徒歩</td>
      </tr>
    </tbody>
となっていますが
記事の内容を反映するようにします
まず、ダッシュボードから
プラグインで
Custom Field Template
で検索し、インストールします
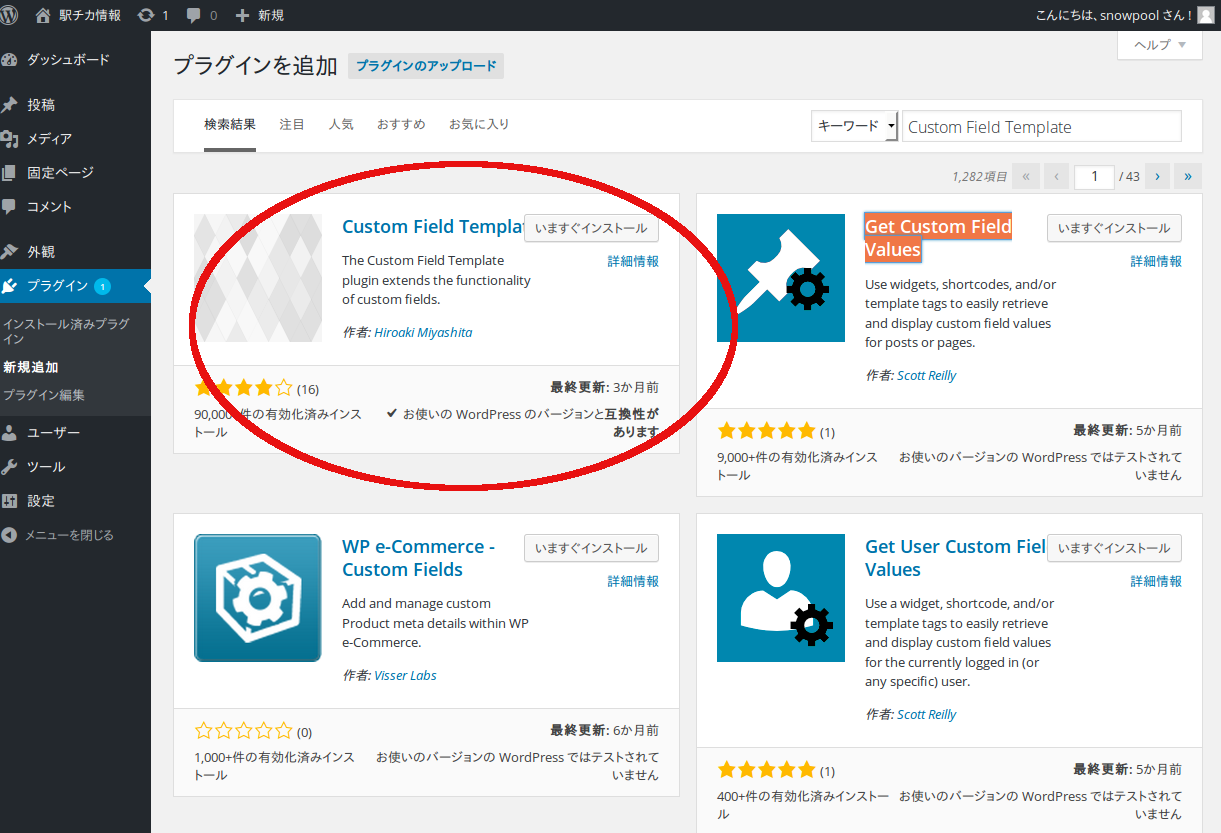
インストールしたら有効化を忘れずに
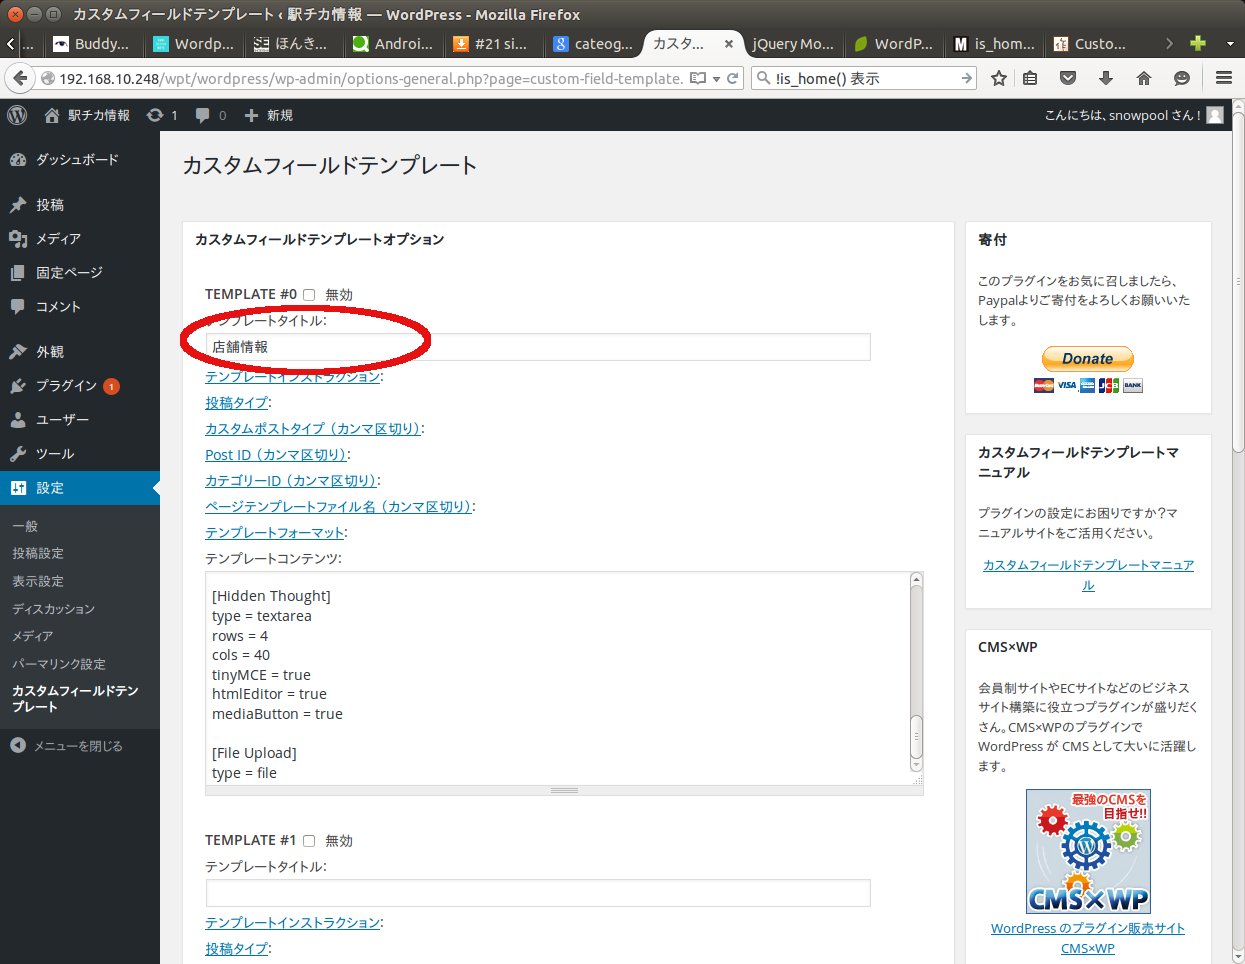
次に、
設定 > カスタムフィールドテンプレート
で
デフォルトテンプレート
から
店舗情報へ変更します
次に
テンプレートコンテンツに
カスタムフィールドにしたいリストを書きます
今回は
[ShopName]
type=text
size = 35
label=店名
[Holiday]
type = text
size = 35
label = 定休日
[Time]
type = text
size = 35
label = 営業時間
[lunch]
type=text
size =35
label=ランチ価格
[Address]
type = text
size=35
label = 住所
[tel]
type=text
size=35
label=電話番号
[Hp]
type=text
size=35
label=HP
[Access]
type = textarea
cols = 80
rows = 3
label=お店への案内
[Impression]
type = textarea
cols = 80
rows = 3
label = お店のひとことメモ
としました
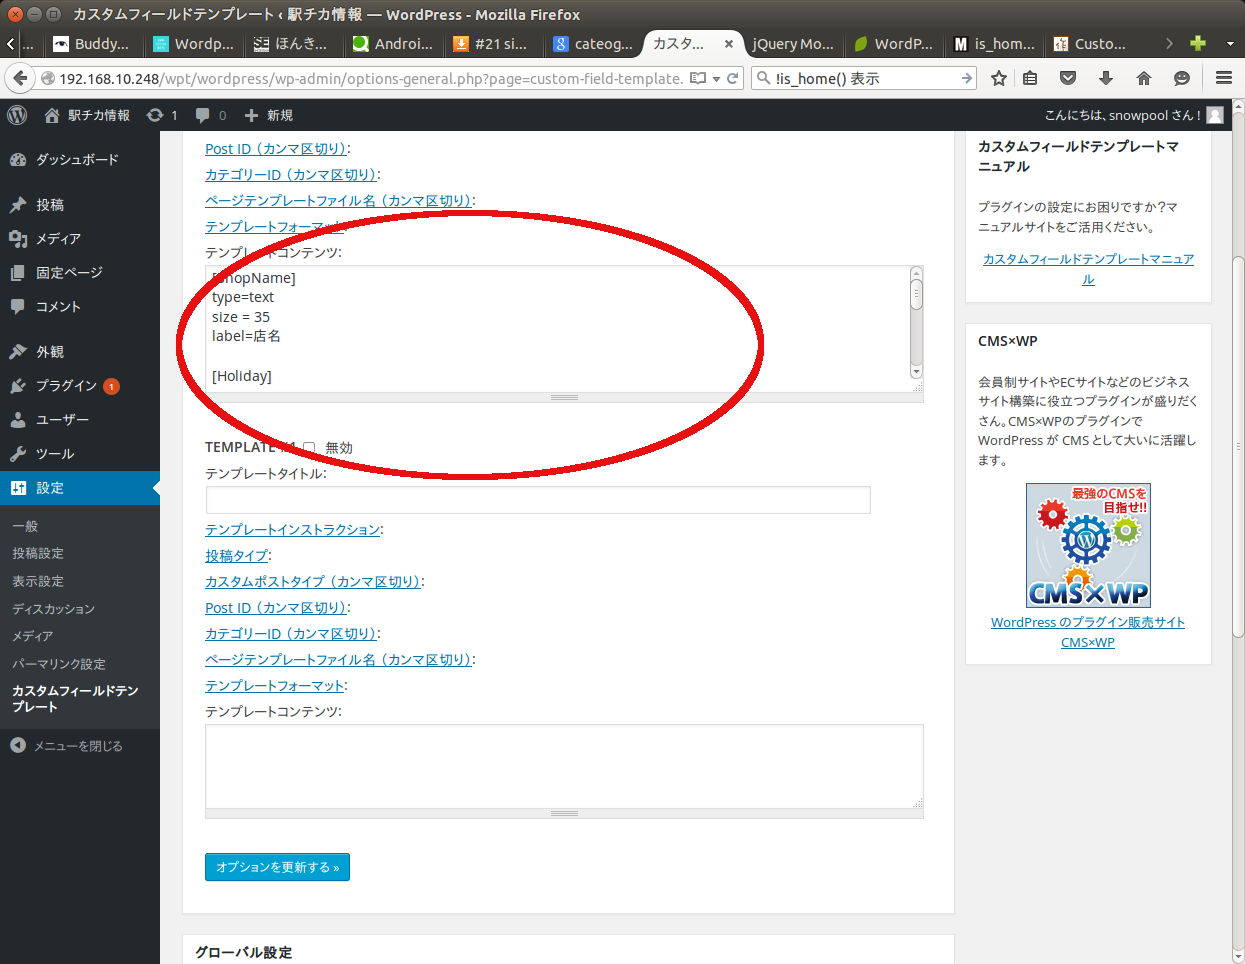
設定できたら、オプションを更新する
をクリックします
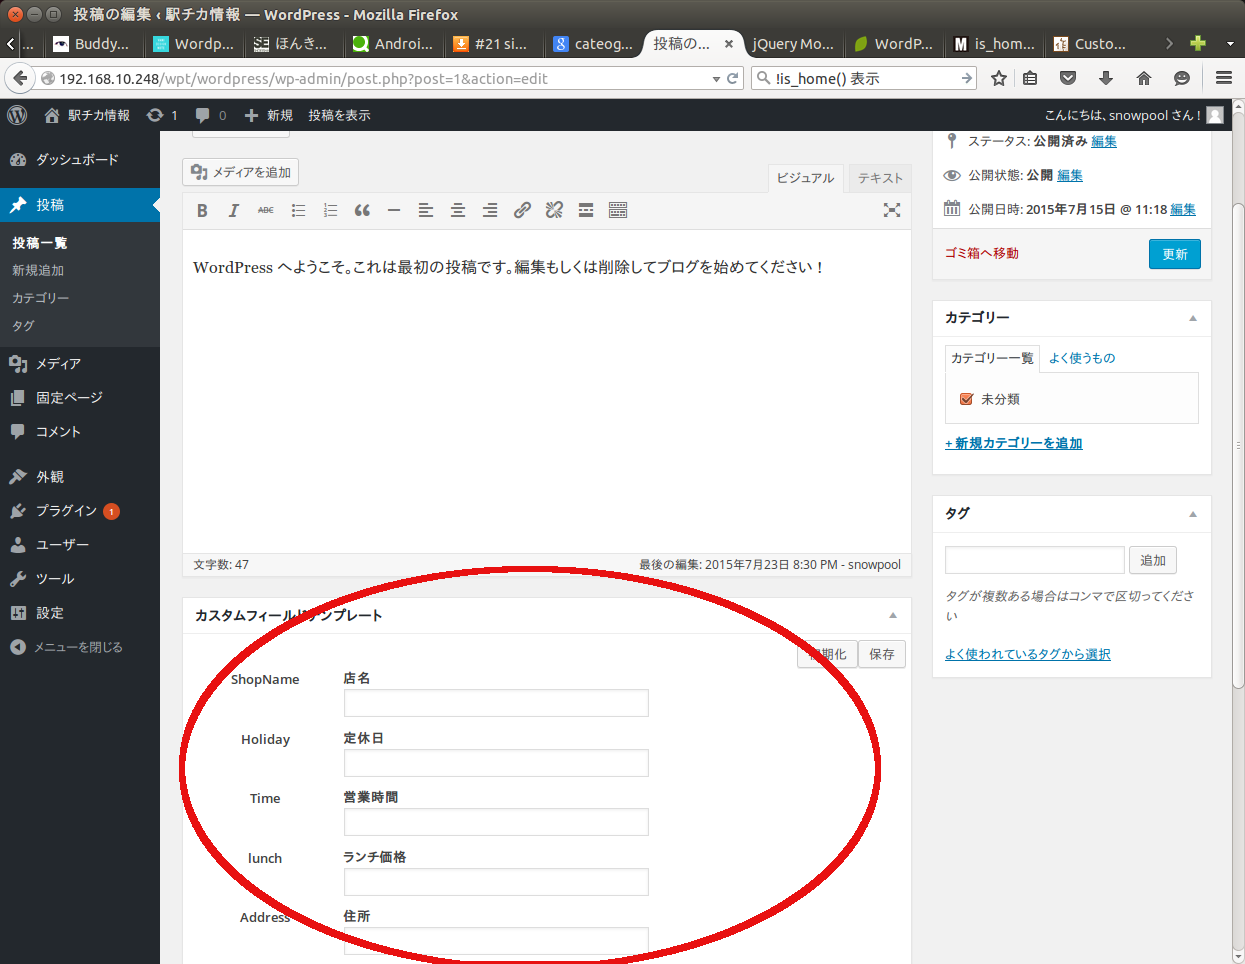
これで、投稿一覧から
hello world を選ぶと
カスタムフィールドテンプレートが
追加されているのがわかります
今回はプラグインの設定だけなので、ソース変更はありません

コメント